Automating A Financial Report with Python
July 27, 2019

Typically, my relationship with programming is exclusive to Populus, my apparel crowdfunding side-hustle. While the powers of Full Stack JavaScript are easy to work with, I occasionally get the itch to experiment with other languages for one-off projects.
Recently, I’ve been spending a good amount of time learning bash scripting as I continue to build DevOps processes for the Populus Web Client and RESTful API, and I’ve always wanted to try writing my own Python script. Since I don’t have a fleet of overworked analysts running the hot numbers across my desk, making the computer pick up the slack is a solid compromise.
What We’re Building
In this post, I’ll do a walkthrough of how I setup a daily report for the S&P500 Index using Python, IEXCloud, and a Digital Ocean Ubuntu Droplet.
Before writing code, it’s good to write out in your own words what you want the program to do. Here’s a flowchart of my thought process for this project.
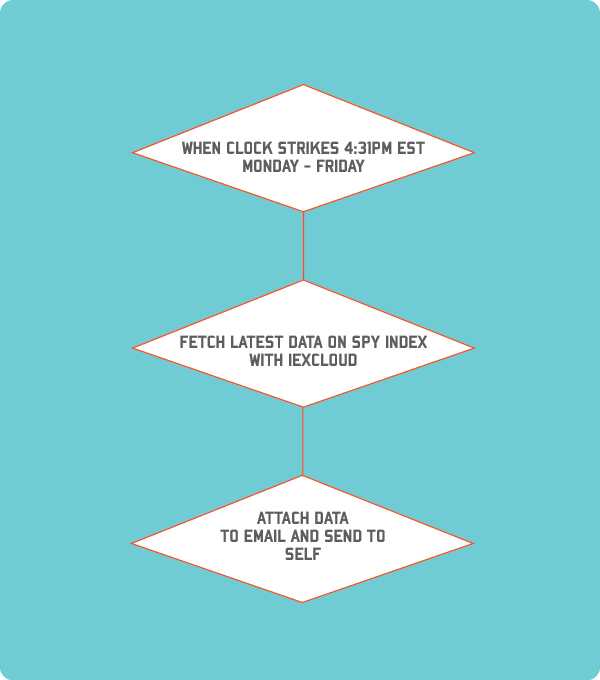
We’ll be creating an instance of Ubuntu on a DigitalOcean droplet, writing a Python script to automate the boring stuff, and setting up a crontask to run the report after trading closes in New York.
Setting up a Server
Now, you can do this project for free on any computer you own, however being able to control a server in the cloud for $5/month is pretty fucking cool. If you already have a Linux machine laying around at home, chances are you don’t need this guide anyway.
SSH Keys
Before we startup our Droplet on DigitalOcean, we should be sure to have an SSH key generated to connect. If you already have a key generated, just skip to the section on adding the key to the droplet.
I’ll be creating a new key just for this guide. Open up a terminal, and run the following commands.
cd ~/.ssh
ssh-keygen -t rsa -C "youremailaddress@gmail.com"
This will prompt you for a few more points, such as the name of the key and if you want a password. I’m naming this one foxy due to my insatiable ego, and not setting a password.
Generating public/private rsa key pair.
Enter file in which to save the key (/Users/michaelfox/.ssh/id_rsa): foxy
Enter passphrase (empty for no passphrase):
Enter same passphrase again:
Your identification has been saved in foxy.
Your public key has been saved in foxy.pub.
The key fingerprint is:
SHA256:T2/NeTvCMXkXcqvIAjT9zHy5tcV1IfRP+LsnlF0KYUA michaelscottfox1@gmail.com
The keys randomart image is:
+---[RSA 2048]----+
|         .E...   |
|            o..o |
|        .  . .o.o|
|       o .  .. ==|
|      . S *  .==O|
|       . o * O+=*|
|        . o *.@.=|
|         . + =.++|
|          .   .+o|
+----[SHA256]-----+
If your terminal looks similar to this, you’re doing great sweetie!!
Lastly, let’s add it to the SSH-Agent so we don’t have to supply the key’s path everytime to connect.
eval "$(ssh-agent -s)"
ssh-add -K ~/.ssh/foxy
Drip Too Hard - Creating a Droplet
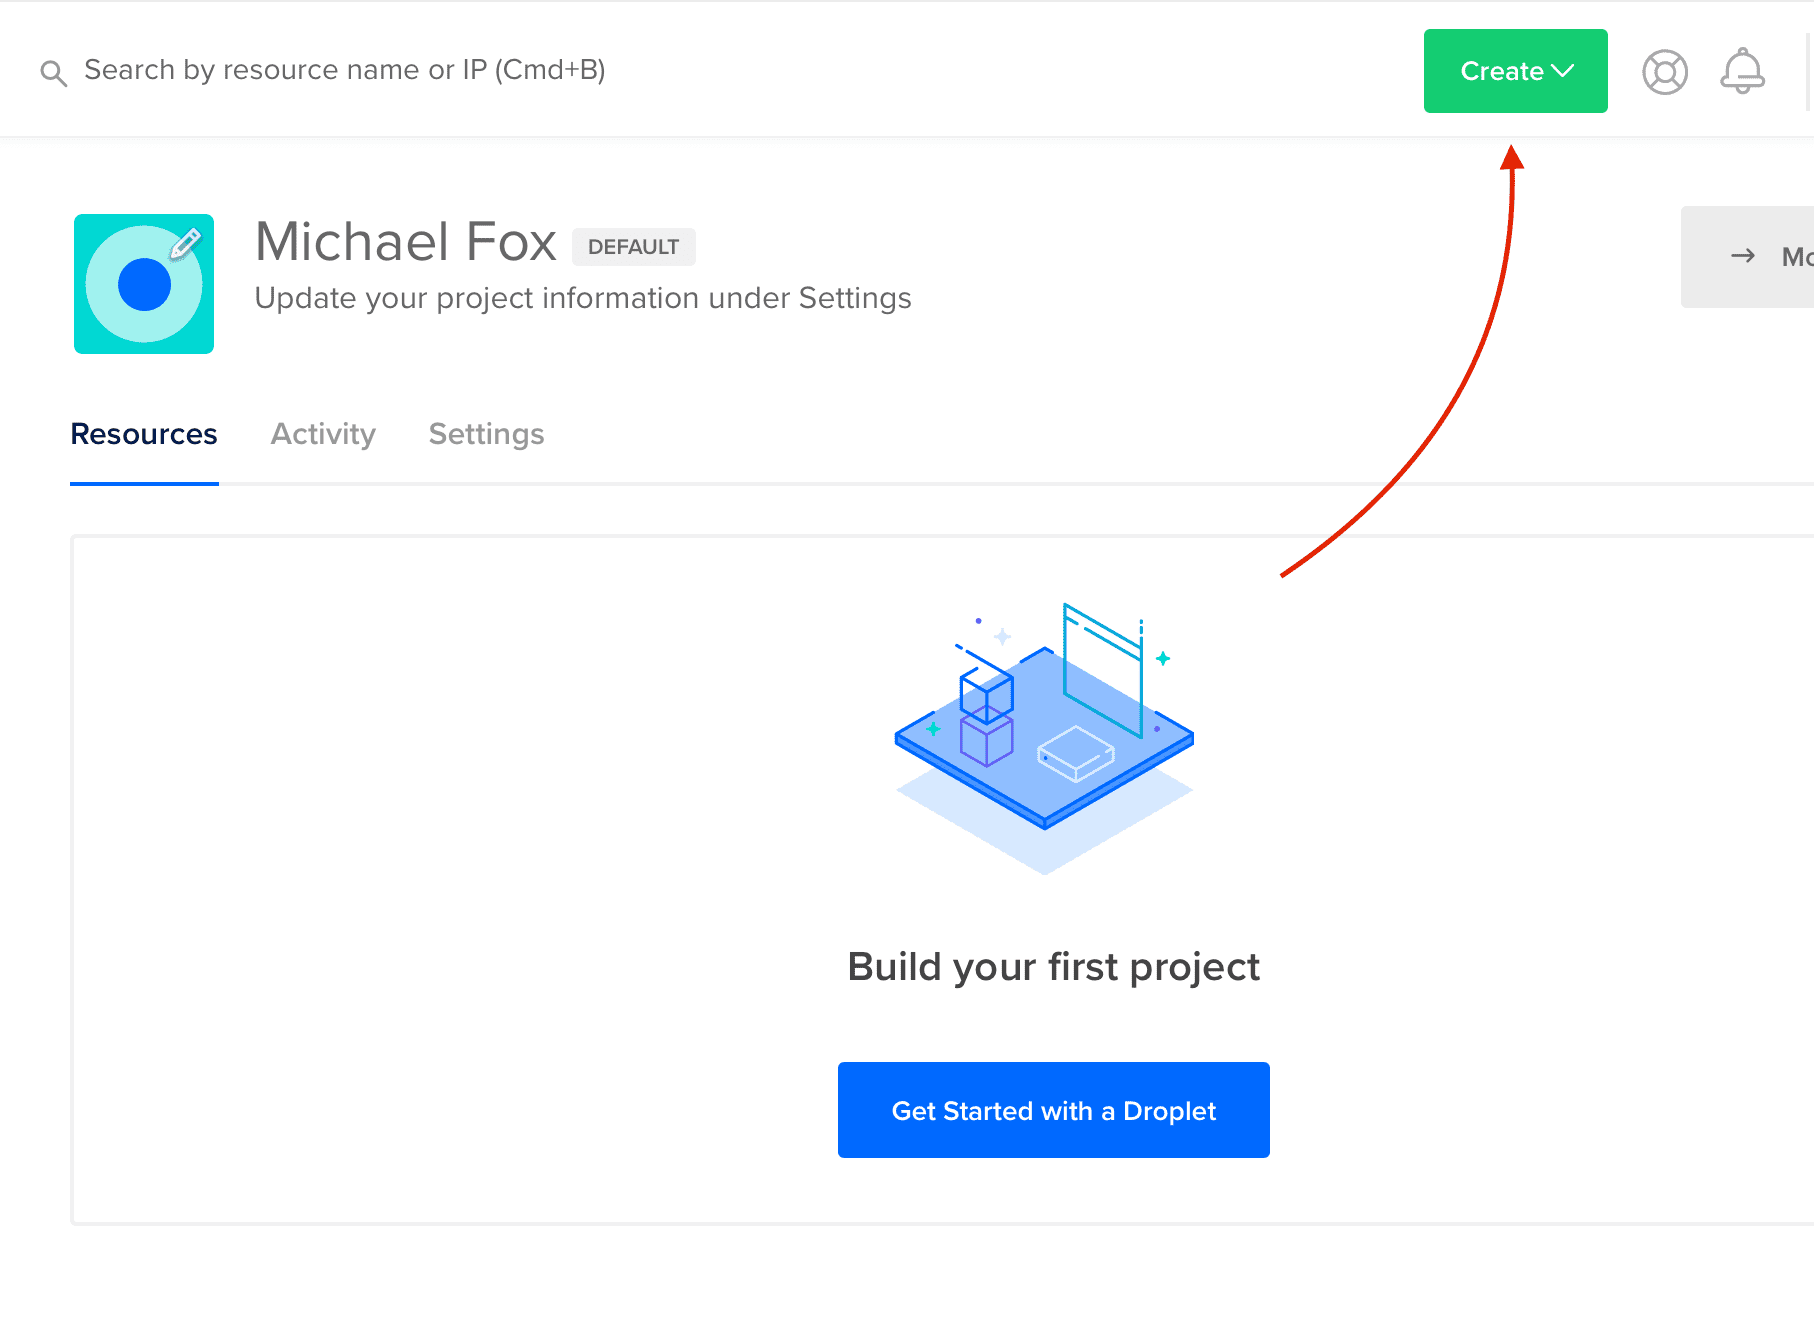
Signup for a DigitalOcean account and create a new droplet.
Under Distributions, select Ubuntu 16.04 (LTS) x64.
Under Choose a Plan, select whichever droplet price fits your budget. Even a $5/month server is pretty powerful.
I usually keep my servers stateside in New York or San Francisco.
Under SSH Keys, select the New SSH Key option. We’re going to “pre-load” our SSH key so we can easily connect without typing a password everytime.
Go back into your terminal and run the following command
cat ~/.ssh/foxy.pubCopy the output from your terminal, and paste it in the SSH key content field. It should start with ssh-rsa and end with your email address.
Name the key something distinct. I chose dropletTutorial.
Choose a hostname. I picked foxy yet again.
Click create droplet, and let DigitalOcean do it’s magic! Once it’s finished loading, you should see a series of 4 numbers with periods between them.

This is your server’s IP address, and you’ll connect to it with your terminal!
Go back to your terminal and run the following:
ssh root@[YOUR_DROPLET_IP_ADDRESS]Type yes when asked if you approve the connection. Unless you have better things to do.
Configuring the Droplet
If you’ve followed this guide to a T, you should see the following in your terminal.
Welcome to Ubuntu 16.04.6 LTS (GNU/Linux 4.4.0-154-generic x86_64)

 * Documentation:  https://help.ubuntu.com
 * Management:     https://landscape.canonical.com
 * Support:        https://ubuntu.com/advantage

0 packages can be updated.
0 updates are security updates.

New release '18.04.2 LTS' available.
Run 'do-release-upgrade' to upgrade to it.


Last login: Sun Jul 28 19:15:27 2019 from 68.3.207.122
root@foxy:~#
In other words, you’re taken control of a computer in a data center. It’ll stay online until you tell it to sleep.
Use Protection
You’ll notice that we’re connected as the Root user, which makes a lot of people angry and is widely regarded as a bad move. Let’s create a new user to safeguard us from digital harikari.
adduser foxYou can click enter the whole way down. We want to add our new user to the sudo group so we can occassionally run root level commands. I didn’t write the rulebook, I just play the game.
usermod -aG sudo foxRun groups fox to make sure you’ve been added to the sudo group.
Let’s get out of our root user and switch over to our new one. Type su fox.
Lock and Reload
In order to secure our droplet, we need to copy the SSH keys from your regular computer. Right now, only the root user has access to them, so we’ll run a few commands and copy it over
# move to home user directory
cd ~

# make a directory for ssh keys
mkdir .ssh

# copy the ssh keys from the root directory to your user's .ssh directory
sudo cp /root/.ssh/authorized_keys .ssh/

# change ownership of the keys to your user
sudo chown fox:fox .ssh/authorized_keys

# allow user to read, write, and execute
chmod 700 .ssh/
Great! Now let’s actually test it out.
Type exit in your terminal to return back to your local machine. Now, type `
Installing Dependencies
We’re going to be using a variety of tools to help us build this project. We’ll need to
- install python
- Opening Port 453 for outward traffic
- install virtualenv
- install .env
Python as a Script
-
IEX cloud signup
-
Writing python code to output the daily return of SPY
- explain what SPY is
-
Writing python module to translate daily return of SPY to SMTP email
-
Configure your gmail for unique password
-
Test email
Timing is Everything
- Set as a crontask

JavaScript, Ableton, and Dachshund fanatic. Blogging about music, code, and screen printing.